


SPARTAN ARMOUR COSPLAY PROGRESS THREAD [LARGE IMAGES]
Posts
Pages:
1

I'm currently in the process of making a set of MkVI Spartan armour from the Halo universe for the October Expo. In this thread I will be posting progress pictures, as well as talking about the methods I'm using so that those who wish to make their own armour, can do so.
Before we start, I should mention that making this armour will take a lot of time, patience, and money to make. If you're not going to see things through, then don't make a start on it.
If you are under 16 please seek a parent or guardian's permission and assistance before attempting to make this armour.
I am not responsible for the safety of anyone who tries to make this armour. I'm also not responsible if your other half/ parents/ whoever you live with get annoyed with you for taking over an area of the house as a workshop. You will need a large, ventilated area to do this in. If you are under 18, you may be unable to purchase some of the materials required to make this armour.
OK, now that all that's out the way, let's get started! I'm using the methods propsed by a site called 405th, which specialises in the creation of Halo armour, and has been proven numerous times to have good results. I'm making the helmet at the moment so this post will center around that.
http://i648.photobucket.com/albums/uu205/Afr0Blu3/PepakuraMkVI.png
First, we load a 3D model of the helmet (the ones I use are by RoboGenesis) into a program called Pepakura. I won't provide links to the files here, you will have to Google it. Pepakura turns 3D models into origami styled pieces that print onto card, cut out, and glue together to form the base of your armour. We will be strengthening and reinforcing this base later. You will want to scale the model so that it fits the size of your head (real world dimensions of the model are displayed on screen within Pepakura). For assistance with Pepakura please reference the program's help files.
I would recommend printing out only the visor for now, as it's a good way to see if the helmet is likely to fit your head, and will save you time and resources. Once you're satisfied with the size of the visor, print the rest out.
This is how things looked before I started.
http://www.sjwebster.com/images/HPIM0458.JPG
You'll need:
- Scalpel. For cutting the card with, don't use scissors as they aren't accurate enough.
- Metal ruler. This is for your safety and will aid your accuracy. Personally, I don't use one as I'm an artist and work better and faster free-hand. If this costs me a finger it'll be my own fault.
- Cutting mat. So you don't ruin a perfectly good table/ worktop.
- Blue and red pens. For marking and scoring folds. These are invaluable.
- Normal ruler. For marking folds with.
- Glue gun. Set to it's lowest setting, for gluing the pieces together (obviously). Do not use any glue that may dissolve later! We will be fiberglassing this and if the resin melts your glue the whole thing will fall apart.
- Laptop. You'll want to work to music, trust me, it helps! You can also display the model on it so you always know which piece you're working on and check that everything looks as it should do.
Start by cutting the pieces on each piece of card. As you cut them out, mark all the mountain folds (folds away from you) in blue and all the valley folds (folds toward you) in red. This has two advantages. First of all, it is far easier to see the folds and whether they're a mountain or valley fold. Second of all, it scores the fold, making it easier to fold them. Some of the smaller folds may require that you press lightly on the fold line with your scalpel to score it but be careful not to cut through the card, particularly on the visor.
http://www.sjwebster.com/images/HPIM0459.JPG
I've found it's best to do all folding as you cut the individual pieces as you'll know exactly how much you've done and won't forget to fold any pieces.
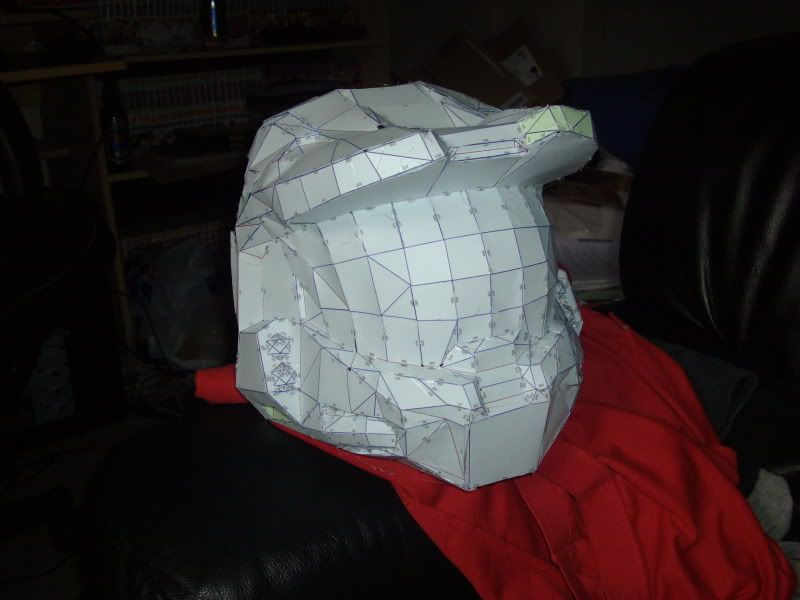
The next stage is gluing the pieces together. Set your glue gun to it's lowest setting and wait for it to warm up. All the tabs and edges on the cards are numbered. Each tab glues to the edge sharing the same number has it. For example, tab 509 should be glued to edge 509. The best way to glue this together is to focus on small pieces and sections to create larger, seperated sections, then glue those large sections together. Things can get extremely fiddly otherwise.
http://www.sjwebster.com/images/HPIM0460.JPG
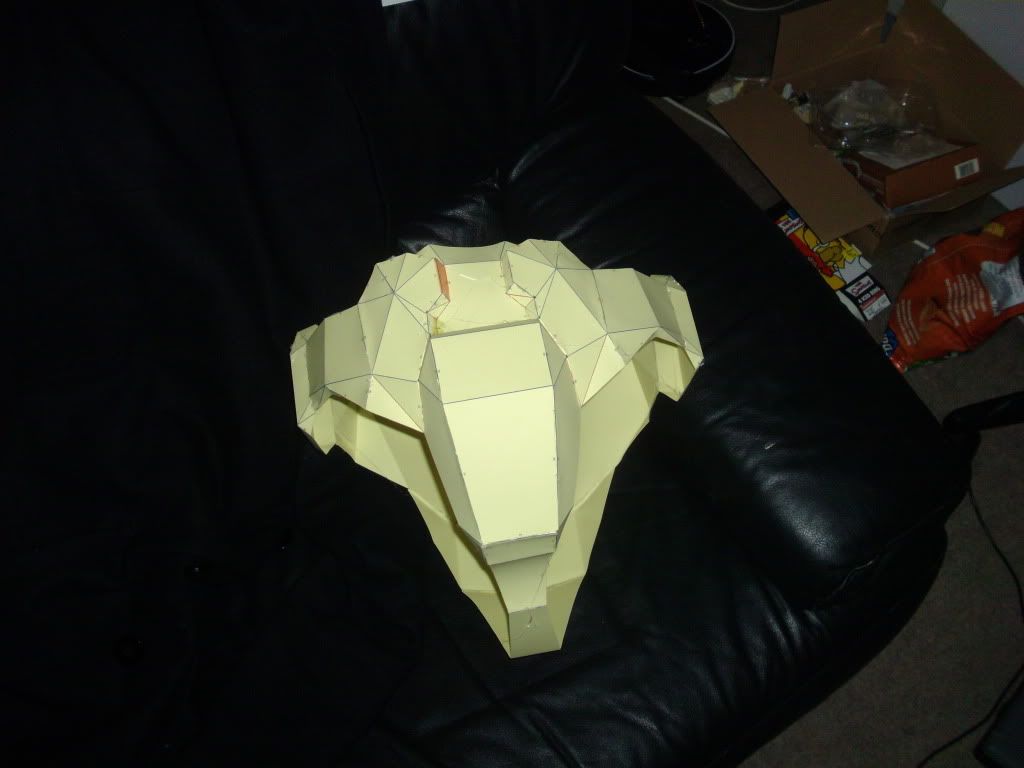
Below is a crotch piece I made earlier but I will need to make another as it's a little too small for me. Oh, and the visor and bulb card sections will be removed later, but for now, we need them to support the structure and aid us with fiberglassing.
http://i648.photobucket.com/albums/uu205/Afr0Blu3/HPIM0374.jpg
I'll be posting all my progress pictures here, and I'll be talking about how to do the next stage, fiberglassing, when I approach it myself.
woah scale down those pictures bub. also certain members of this forum will understand why i am declining to comment. it's for my good as well as yours

I was hoping for Leonidas. I mean, this is kind of cool but it's one of those hobbies that I just don't get! It's also not a half-naked man.
Changed the images into text links. Your browsers should resize them fine now, and people who want to zoom in will be able to. I would say it was harsh for those on dial-up, but who the hell uses dial-up these days? =P
And trust me, no one wants to see me half naked XD
And trust me, no one wants to see me half naked XD
You really do need to scale down the images. In GIMP or Photoshop saving it as a 256 color png would do wonders, but making the images something like 800x600 would be even better for many connections.
I'm using dial up on my other computer, and I have verizon wireless internet in which I can't use more than 5GB of internet per month, so images like these can be potentially dangerous.
It's crazy stuff your doing, I sure don't understand any of it.
I'm using dial up on my other computer, and I have verizon wireless internet in which I can't use more than 5GB of internet per month, so images like these can be potentially dangerous.
It's crazy stuff your doing, I sure don't understand any of it.
yeah, those are big, i think i could read the entire newspaper in the pictures lol.
i'm curious to see how this turns out. are you going to be paper mache-ing it after?
i'm curious to see how this turns out. are you going to be paper mache-ing it after?


Sexy, I think you should just leave it with the helmet and do some kind of Master Chief in boxers cosplay, heh. But really it's cool, it reminds me of the Halo kid who made all those kinds of weapons out of cardboard (or something else) and made them identical along with the suit. Most would say he needs to get laid, but hey, he's only 11 and it makes me jealous I didn't do something crazy like that back then, even if I'm not a fan of Halo.
I would like to say two things. First, an eleven-year-old should not get laid. Second, an eleven-year-old should not be playing HALO.
I have spoken.
MODIFY:

I have spoken.
MODIFY:

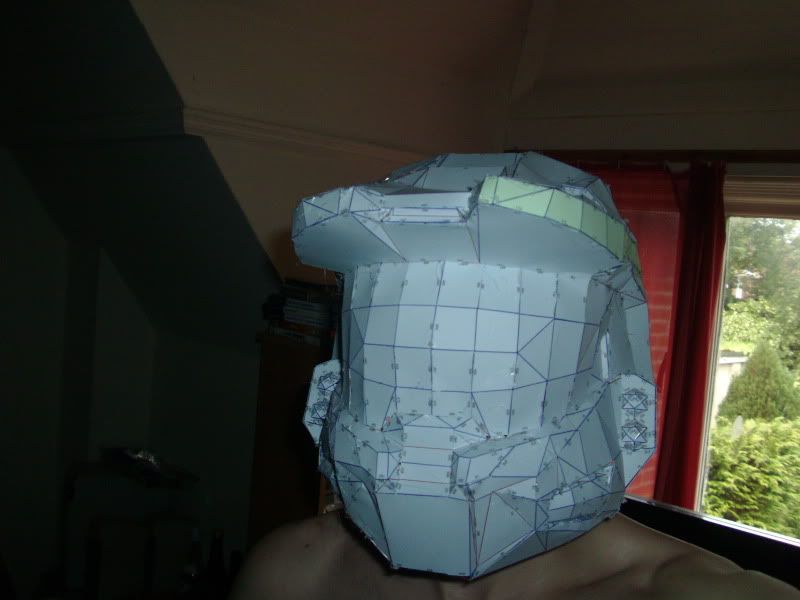
No 300 spartans I'm afraid, I don't have anywhere near the build for that XD Even this armour's starting to look pretty chunky on me. As for how I see, I'll be cutting the visor out later, it's just there for support and to help the helmet keep it's shape right now.
Just finished the chest piece. It's a little bulky, but I will be wearing padding or something so I don't look so weird and scrawny in it XD

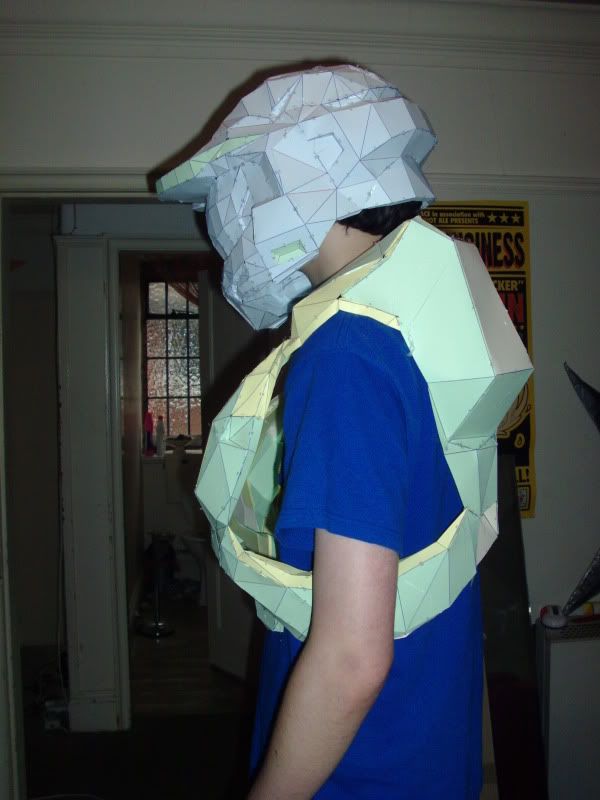
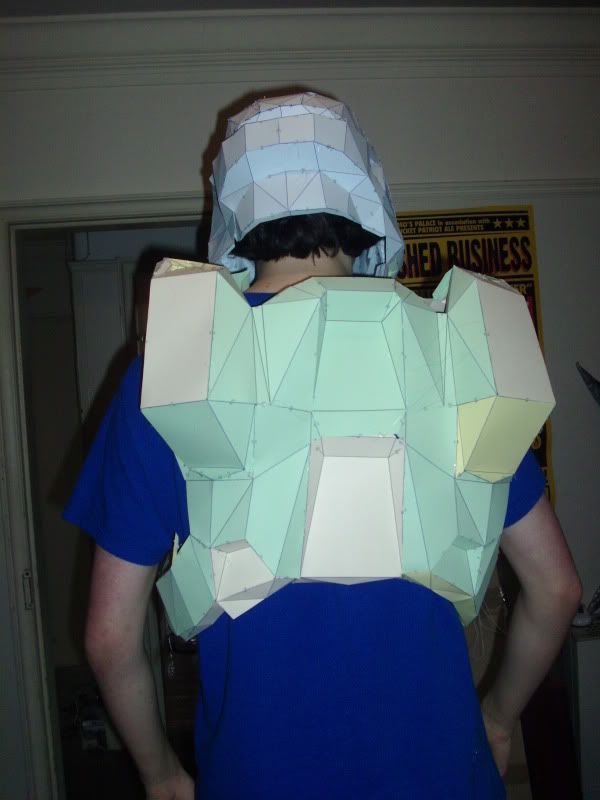
Just finished the chest piece. It's a little bulky, but I will be wearing padding or something so I don't look so weird and scrawny in it XD
Pages:
1

