


MAKING 3D GAMES IN LITE-C - PART I
A tutorial series designed for anybody to get into 3D game making.
 Eddie
Eddie- 07/08/2009 11:01 PM
- 9355 views
Preamble
My purpose here is to make the creation of 3D games more accessible to people who would never dream that it is so easily within their reach. With 30 minutes of your time I am confident I can convince you that with a little work you can go on to make something really impressive in the long term. It's all to worrying when you see people wasting hours of their time trying to stretch RPG Maker 2003 that little bit further when those hours could be spent more productively - coding from scratch, without restriction.
Learning Outcomes
This is what you will learn in this initial tutorial:
- 1. The mentally invigourating nuances of the Lite-C Engine.
- 2. How to create an environment and pan around it.
Without further ado, let us begin part one.
Part 1 - Setup!
Required Downloads
Download and Install, Lite-C Script Editor (SED) and Model Editor (MED). These are the two key tools that you will be using for the duration of this tutorial. There are other optional programs you can download which will make screenshots used in the tutorial easier to understand but you don't need to worry about that too much if you're confident you know your way around image manipulation.
| Required Programs | Comments |
| SED- Script Editor. The heart of your Lite-C creation.link(10 MB) | SED is where your project code and resources are all linked together in one editor program. When you're finished with your project you can also compile it for non-commercial distribution (Commercial requires a license upgrade). |
| MED- Model Editor. Where 3D models are made.link(10 MB) | MED is a very capable tool for creating your 3D content, models, terrain etc. |
| Recommended Programs | Comments |
| Irfan View- Excellent for image conversion and easy image manipulation tasks.link | Lite-C requires you to convert images to specific formats for use and Irfan View is just the job for this. If you're using Paint Shop Pro or another program that can export.tga, .pcx and .bmpthen you need not worry about this too much. |
| The GIMP- The GNU Image Manipulation Program - No leather or gags here!link | If you're a fan of free, legal, open-source software like I am then you'll quite like the GIMP. It has many of the features of your $1000 image manipulation package and is absolutely free. I will be using the GIMP in the examples in this tutorial so if you're planning on using something different make sure your software package can output images with an alpha channel. |
| 3D Studio Max 2009 Trial- If you can afford to buy this, and you're female - Hi, I'm Ed :naughty:link(1 GB) | Whilst I sing the praises of MED you will not find an easier tool to use than 3D Studio Max. If you're looking into making your own models you may want to do a little extra reading into 3D modelling in max. It has excellent utilities for unwrapping UVW coordinates so that you can apply the texture (skin) your model with ease. The harsh reality is that if you want to buy this it'll set you back a few grand but every time they release a trial is a 30 day honeymoon for me. |
| Extra Reading | Comments |
| Lite-C Workshopslink(10 MB) | You will find these contain a lot of the beef of what I am telling you and more. The only difference is I am telling you from the perspective of a fellow newbie and I am aware of many of the pitfalls that you can fall into. I do, however, recommend you download and have a look at the workshop since it will boost your knowledge of what's what in Lite-C to no end. |
It seems rather obvious to say this but you need a DirectX 9 enabled PC. This tutorial was written on a Celeron laptop with built-in Intel graphics so if your PC isn't made of papier mache you should get on with this just fine. It it is a dust-stained relic from the 1990s it will not.
Now time to make something to play with.
Part 2 - My First Program (In Lite-C)
Covering, how to create and run a new script with use of strings.
1. First things first, fire up SED.
Tip: You'll find that under Start > Programs > Lite-C > SED Script Editor
2. Check out the symbols along the bar at the top. If you've ever used a script editor before then you should feel right at home. If not, don't worry I'll guide you through it.

- Note the red and black play symbols. The red one runs your current project, the black one runs the currently open script.
- Also note the blue and black double-slashes. If you have a block of code you can add and remove commented* line en-masse.
- The little cog symbol brings up the project configuration menu, this is best used when you have multiple source files and you are using the red play button to execute a main script.
*Comment use:
//A commented line begins with two slashes and is ignored by the compiler.
3. When the program started up you should have been welcomed by an empty script. If not go File > New or press CTRL-N. Save the empty script as test.c in a new empty folder of your choosing. It is good practice to create an empty folder for new projects as all the scripts, models and assocatiated files you use are all stored in the same directory as your script unless you set up paths (I will explain how to do this later, don't worry about that for now). It is also a good idea to save an empty script before you start working with it as the editor recognises the .c extension and highlights your syntax (code words) accordingly. Syntax highlighting is a great indication of whether you are doing something right or wrong.
4. Add the following lines of code:
#include <acknex.h>;			//You need these includes at the start of your main script.

#include <default.c>;


STRING* name = "Edgar Allanwood";


TEXT* test_textbox = {					//Add a text object

	pos_x = 10;								//X position relative to top left

	pos_y = 10;								//Y position relative to top left

   font = "Arial#18";					//Font and size size

   flags = SHADOW | visible;			//Flags alter text behaviour

   string(name,"created this!");		//Strings to be displayed.

}
Change the string name to your own and hit the black play button and hopefully your script will compile and run. If not it will halt and give you an error. If it does you can't copy and paste and you should probably throw yourself off a bridge now.
 | Success:You should have a black window with your text positioned at 10x10px from the top-left! If you close the window and go back to your script you will notice that some key words are highlighted in dark red. If you place the cursor on a key word and press F1 a help window will appear with information and properties. This will allow you to change the way the text box looks and behaves.Tip: If you want to do a carriage return in a text box you don't have to create another below it. Just type\nwhere you want the line-break. |
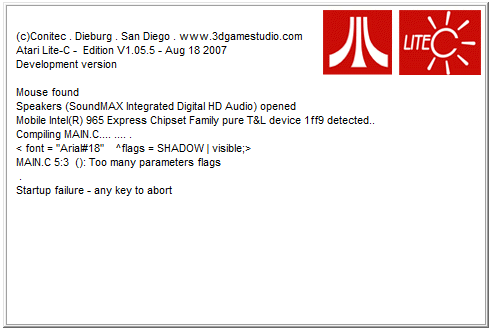 | Failure:I left a semicolon out of one of the lines here to demonstrate a compile error. If you don't understand what the compiler is telling you then this is the most likely problem (and for beginners the most annoyingly common error they will make). |
Let's modify the program so that we've got some 3D content.
Part 3 - My First Level
Covering loading a terrain as a level and simple camera movement.
Firstly, download this file

Tip: Terrains and models are stored in .hmp and .mdl format, respectively.
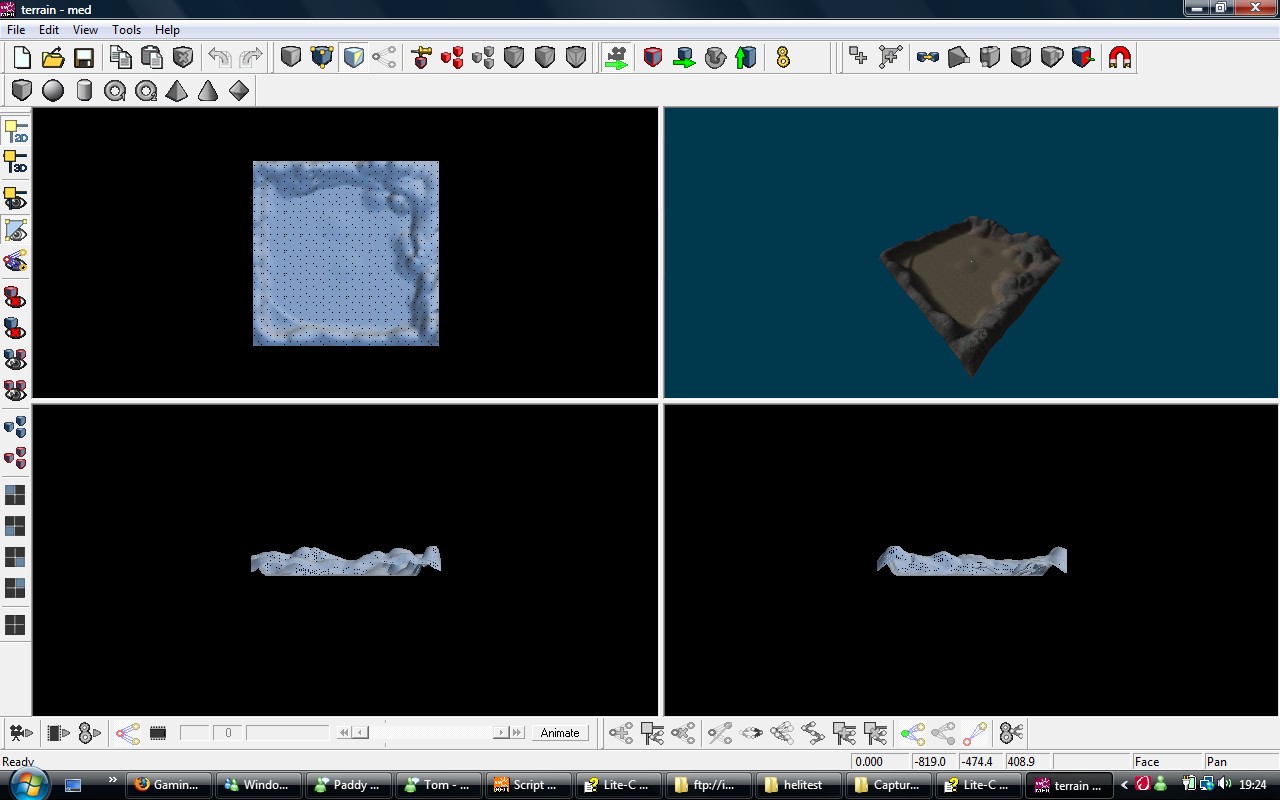
If you want, double click on terrain.hmp (The file you just downloaded) and it will load up with MED Model Editor. In the 3D viewport you can hold the right-mouse button to zoom in and out and hold the left mouse button to pan around. The use of MED to make your own terrain will be covered in the next tutorial.
Terrain loaded up in MED: http://rpgmaker.net/media/content/users/222/locker/med_terrain_screen.jpg
This next block of information is important and fundamental to your scripts in Lite-C so pay attention.
During runtime the program executes a funtion called main. As implied by the name, this is the main function and is executed first, after your includes and variable declarations etc. The main function is traditionally divided into two sections:
What is a function?
A function is a block of code containing instructions that is called e.g. summoned by the program. For example:
function make_coffee(addmilk)

{

boil_water();

add_coffee_grains();

if (addmilk) add_milk_to_cup();

}


function main()

{

make_coffee();

}
Above is a function that calls functions from within itself. Notice that a boolean (true or false) parameter has been included in brackets for the function definition. If it's true then the function add_milk_to_cup is called. Notice the use of curly brackets and semilcolons. This punctuation is essential and must be placed correctly for the code to compile.
- 1. Initiation section - operations that happen once when main is called.
- 2. Repeated loop - operations that are executed every frame.
In code this is structured as follows:
function main()

{

	//This section happens once when the function is run initially

	while(1)

	{

		//This section happens every frame due to a while loop.

		wait(1);   //Waits until the next frame - avoids endless loop

	}

}
Main normally goes at the bottom of the program below everything else.
Now to test this theory in a program of your own. Create a new script in the same directory as before (making sure terrain.hmp is present) and paste in the following code:
#include <acknex.h>;			//You need these includes at the start of your main script.

#include <default.c>;


STRING* numstring = "";


var framespassed = 0;


TEXT* test_textbox = {					//Add a text object

	pos_x = 10;								//X position relative to top left

	pos_y = 10;								//Y position relative to top left

   font = "Arial#18";					//Font and size size

   flags = SHADOW | visible;			//Flags alter text behaviour

   string("Frames passed:",numstring);		//Strings to be displayed.

}


function main()

{

	//This section happens once when the function is run initially

	level_load("terrain.hmp");

	wait(3);		//Wait required for level load

	while(1)

	{

		//This section happens every frame due to a while loop.

		framespassed++;	//incrememnts variable by 1

		str_for_num (numstring, framespassed);	//makes string from variable

		wait(1);

	}

}
Run it by pressing the black play button and observe the results.
The engine has loaded the level and the string in the top-left is a number counting the number of frames that have passed. Checking the code you will see the method for incrementing a variable in a loop and the way you can convert a variable to a string for display on the screen.
Let's liven things up a little, add the following to your while loop in main:
camera.pan += time_step; //pan the camera by the time_step
Re-run the program and you should find that the camera rotates about it's Z-axis. You can even go one further. Delete the line you just added and replace it with:
		camera.pan -= 5*time_step*(key_force.x);		//pan the camera

		camera.tilt += 5*time_step*(key_force.y);		//tilt the camera
Now try your direction keys whilst running the script. Neat? You are altering the pan and tilt of the camera with your key strokes. Notice the inclusion of time_step. This makes sure that the camera pans at the same speed on all machines. If you did not include a time_step then the camera would pan at the same speed as the frame rate that varies between systems due to hardware differences.
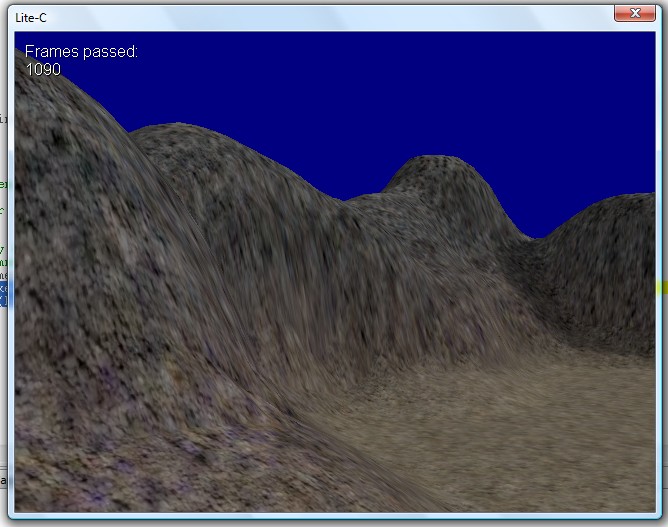
Your 3D environment.
Next Time...
This is the first tutorial I have ever written, so depending on the response I get I may revise this initial installment and continue it or I may just recede back into the depths of Forumville and bitch about RPG Maker overuse. If you have any questions at all, drop me a PM and I can help you out. Your enquiries will also help me make it clearer for others.
Next time I shall cover the addition of entities, terrain generation, basic use of the physics engine and environment features (i.e. the sky).
Homework
If you want to get ahead of the game, look into terrain generation using terrain texture generator (Fantastic free tool). Here are some hints to get you started:
- Create a square grayscale heightmap with white for the peaks and black for the lows.
- Open it in TerrTexGen and fiddle away.
- Open MED and import heightmap (locate your grayscale image) 100x100 triangles.
Thanks for reading, see you next week.
-Ed
Posts 

Pages:
1

For those who are interested, I will be porting these to RMN weekly and continuing them in my free time this summer.
This is a pretty cool tutorial. Smart people like me take existing open-source 3D engines that use OpenGL for the graphics renderer and add whatever they need though.
Hopefully this series you have planned will convince some people to step out of their event based comfort zone and try out some actual programming, even if they don't move on to 3D.

Well I will create a game profile for the tutorials and upload the examples to it. Like a centre of operations. Good idea man.

Is there a way to add more font to the editor? There is now Thai font available so I can't see what I type in Thai in Lite-C, though it display correctly when I run the program :O

The MED link is broken :/
it keeps giving me:
"OMG! YOU BROKE THE INTERWEBS!
We're not sure how you did it, but you unearthed our error page. Quick! Click one of the links below before the fabric of space and time begins to unravel. Oh, and sorry for the inconvenience."
it keeps giving me:
"OMG! YOU BROKE THE INTERWEBS!
We're not sure how you did it, but you unearthed our error page. Quick! Click one of the links below before the fabric of space and time begins to unravel. Oh, and sorry for the inconvenience."
Pages:
1

