


YEM IN-GAME ADDITIONS TUTORIAL.
Like creating biographies, in-game tutorials, art galleries etc
 polarcactus
- 03/02/2012 04:30 PM
- 4077 views
Hello everyone. It's been a while since my last tutorial, so I'm back with another one! Only it's something different, a little personal touch to your RPGs, made possible with the highly versatile Yanfly Menu Melody script. After you have done viewing this tutorial, you will hopefully be able to create detailed in-game character biographies, game manuals, an in-game art gallery, anything you wish, since it works off the same principle. :)
It's a little advanced for the very beginner, but hopefully my instructions aren't too hard to follow. ^^
This one focuses on creating a detailed in-game biography for your little digital characters. ^^ But you can modify it to make an art gallery, in-game tutorials, that kind of thing.
So, how do I do this, you ask? Well, you'll need the following scripts, a few images and only a little patience.
- Yanfly's Menu Melody script ( part of YEM, or Yanfly Engine Melody ). I'm using the FF13 layout on mine.
- 3 variables.
- Ccoa's Weather script ( optional ), unless you don't like pretty sparkles. ^^
- Woratana's Multiple Fogs script ( optional ).
- A nice, ambient track for the BGM.
- A couple of images: One for the map parallax ( explained below ), and another 4 for the actual biography images. Or just two if you are creating an art gallery, one for the background, and the actual image that you'll display. If you are going to create an in-game art gallery, it is recommended to keep the resolution to 544x416 ( default res in VX ) since I haven't added panning for images yet.
STEP ONE: Right, let's get into this. Simple script editing and common event linking.
- First of all, open up your game and press F11 to open up the script list. To install the YEM scripts, just paste all of them above Main.

-Scroll down until you see MENU_COMMANDS: Create a new hash below :equip and type in ':event1'. This will add a new command to the Main Menu.

- Now, to link the common event to the actual script. Scroll down to Section II ( the Lunatic section ), and go to :event1 ( it's already there in the original script, you just have to edit it ). Edit the above exactly as you see it, BUT... your common event ID ( number 16 in my case ) will probably be different. For example, if this is your first common event, it will be '1' under 'CEvent'. Ignore the icon ID. Unless you're using icons, of course.
STEP TWO: Creating the background image for the biography.

First, plan out your layout. How will everything fall into place? This includes where your text/images will come, so plan carefully. Once you're happy with your layout, create the background image in a graphics editor of your choice. Once you're done with that, import it as a parallax, and create a new map. Set the map options to 'View parallax'.

Use these settings if you want a looping fog bg, and some nice sparkle effects. :)
STEP THREE: Creating the common event.

This is a long one... but hopefully you can follow the visual image. To explain everything bit by bit... here goes:
-First of all, you're going to fade out your screen. It looks a bit weird to transfer immediately to a map without that, and it makes everything flow smoothly.
- The variables. This will enable the common event to memorize the players position when they transfer to the 'Biography Map'. Map ID in my case is 89, it will be different for you, of course. :)
- Transparency: Well, you don't want to see your little chibi when viewing that bio, now do you? ^^ Now, I'm not sure how it will work with a caterpillar script, but I'm thinking you'd have to disable it, then re-enable it when you transfer back to the playable map.
- If you are using Woratana's Multiple Fog script, then you must delete ALL fogs, otherwise it creates lag issues on the 'Biography Map'.
- Erase all pictures as well, especially if you are using picture overlays. Don't worry about your images disappearing when you go back to the playable map, the parallel process will re-enable all pictures, fogs, overlays and what have you. :) For the BGM however, you have to enable the map tune of the playable map on every parallel process, otherwise the tune from the in-game bio will keep playing. Annoying, but I don't think RMVX allows you to memorize BGM like RMXP. There's probably a script out there that I may have overlooked, though.
STEP FOUR: Character selection and image display.

This one is easy enough to understand, I hope. I used four images here to make up the complete biography. They all fade in one after the other. The 'Loop' and 'Break Loop'
function enabled the player to return to the playable map when the 'Confirm' button ( or the 'Enter'/Space key ) is pressed. The video give you a general idea of how all of this comes together. :)
STEP FIVE: Ending off.

This merely erases all images, and uses the variables to return the player to the playable map.
Visually, it would follow like this:

After you are done following the tutorial, open your game and a new section called 'Biography' will be added to the main menu.


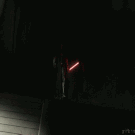
This is what the finalized image looks like.
And all you need to do is hit the confirm or Enter button after you are done viewing, and you will be returned to your playable map.
Whew, that took a while to write. Certainly my longest tutorial yet, but I hope you'll find it handy one of these days.
Oh, and credit is appreciated if you do use this system. :)
Posts 

Pages:
1
Pages:
1

