


DFALCON'S PROFILE
DFalcon

2141
Software engineer and amateur game developer with a focus on challenging non-twitch gameplay. I set the bar for "challenging" pretty high.
Other major chunks of interest go toward reading, math and tabletop games of many stripes.
Other major chunks of interest go toward reading, math and tabletop games of many stripes.

Search
Filter
 Visions & Voices
To put it very lightly, some people have been having trouble with this game. Since I've put enough time into it that I'm not really, anymore, I thought I'd try to pass a bit of that on, so people can get a better look at what's good about the game without having to struggle so much with what wasn't.
Visions & Voices: Day 1 Help
This is a supplement, not a replacement for either the "how to play" file or in-game help.
First Steps (If nothing else, read this!)
Choose a name and archetype (I wouldn't pick a custom class until you have a better idea of what you're doing, but if you must, it's a decent idea to max one stat) and proceed through the intro. Let Telia join you.
Do not get close to the glowy white balls - these are enemies, and you don't want to encounter them before saving. Go west a map then north a map (map transition points are hollow circles). You'll see a big building, the Ogre's Mug Tavern. Go in there. At the crystal upstairs, save but do not sleep.
Congratulations, you've saved! (An informal poll suggests that a significant number of players try to talk to a ball before reaching the tavern, without knowing it's an enemy or being ready to meet one.) Feel free to ignore the rest of this post and experiment... though some of what's below may take you a while to figure out.
There are stats. Characters do damage. Theoretically, shouldn't there be some connection?

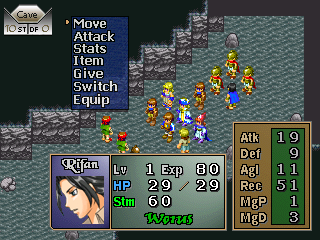
You almost certainly noticed three stats quickly: Energy (En), Willpower (Wp), and Sheer Force (SF). Energy is HP and the other two are different types of MP.

If you did slightly more reading you should have learned of the other five public stats: Bravery, Perception, Charisma, Tenacity, and Logic.

Skills and weapons state which stats help them be more effective, but with codewords. Melee->Bravery, Ranged->Perception, Psychic->Charisma, Force->Tenacity, and Sleight->Logic. You can see that the shuriken described above is a Ranged/Sleight weapon, so its damage depends on the Perception and Logic stats.
The stats listed on a weapon will give you a pretty good idea of who in your party is best with any particular weapon, but that alone won't tell you how good the weapon is: you'll have to try it, or any other piece of equipment you want to evaluate, out. Complicating this, but a very useful thing to learn, is that some monsters are weaker against certain elements or against damage produced by certain stats or weapon types. When evaluating weapons, you may do best to check against a known baseline.
As a final warning, several characters join with weapons they're really not much good with. Don't take starting equipment as an indication of prowess, just check the stats.
Two kinds of MP? Tell me about skills.
Wanderer's skills are heavily tied into the difference between Willpower and Sheer Force. His ability set looks like this:

Necrotic Wish (Willpower cost): offensive spell, gives target weakness to elements.
Arcane Drain (Willpower cost): absorb Sheer Force from the target enemy.
Force Chain (passive): occasionally (in battle) a dark flash will show, and the entire battle party regains some Sheer Force.
When you hit Reverse Polarity, it changes to this:

Radiant Wish (Sheer Force cost): heal/buff; heals target, then increases target's max En. This is listed as Sleight, and my 100-logic Wanderer heals 35-55 En, depending on target max En.
Arcane Snatch (Sheer Force cost): absorb Willpower from the target enemy.
Power Chain (passive): occasionally (in battle) a light flash will show, and the entire battle party regains some Willpower.
Reversing polarity again will change it back to Necrotic. Polarity changing can be done any time outside of battle, and is fast in-battle, only taking ~1/3 the time of another action.
Flipping polarity is the key to getting anything done, especially early on. For my Brave Champion, Radiant Wish is an essential heal, but I need to switch to Necrotic so that I can get SF back, either through Force Chain or (less often) Arcane Drain.
And Force/Power Chain is significant. It doesn't occur regularly, and guarding forever won't make it keep happening, but in a middle-length to long battle you can expect to regain 4 SF or 6-8 Wp per character once or twice, and that makes an enormous difference in resource attrition. With polarity flipping between heal and MP regen, you can take on minor battles almost indefinitely.
Now for a brief look at Telia's combat skills:

Pilfering Jig attempts to steal from the target enemy, with a side effect: Telia is more likely to be targeted by all enemies. What can be stolen depends on the enemy type: some give a few coins, while some give more profitable items, but it's rare to get anything you'd want to keep or use instead of sell (at least on Easy/Normal difficulty - higher up you might want some of the consumables more). Some bosses likely have good or at least interesting steals? This also does a little damage even if the steal fails.
Ballad of Zephyr gives En regen (about 8 per turn) and makes its target less likely to be targeted by enemies. Since regen and degen trigger every time the unit with them acts, Zephyr is especially good for fast characters with lower max En, like Telia herself.
I've never really noticed any huge effect from Featherlight Song. Oh well.
Okay, that sounds fine in theory...
First you might as well explore where it's safe, right? Walk around the village, enter buildings and basements, talk to any people you can find, maybe see if you can leave. It never hurts to check a twinkle. Get into fights a couple times to see how they work, and reload or run back to the tavern to save when you think you ought. (Remember that monsters respawn once you leave a map.)
While exploring you will find boxes, which contain useful items - right now, generally food or a key or two. You'll also encounter locked doors and chests. Over the long run, I suggest mostly using Telia's Unlock feat in the place of Ornate Keys, as they are harder to come by and you'll appreciate having them later on.
Be careful, your limit for any item is 9, and you won't get any warning or chance to prevent overflow. (Especially relevant for keys, Energy Shots, and food. The food isn't so bad, and you can sell Energy Shots for a good price, but you might regret losing Ornate Keys.) On the other hand, unlocked boxes will seemingly sometimes disappear if they're not collected within a few days.
I won't list all the chest contents right now, but I will put in the early highlights:
The smithy in the village southeast has two typical chests: one with a heavy armor (and a next-to-useless King's Throat), one with a Spiked Buckler.
The farm south of the smithy has a barn. Upstairs in the barn is a typical chest with a couple useful accessories.
The large building (courthouse) in the village north has a typical chest upstairs, also with a couple useful accessories.
There's a path north from the village northwest that leads to a cave. You can sneak all the way to an ornate chest in the cave basement: unlock it to free a shopkeeper. If you're feeling adventurous, with careful running you can pull the enemy just northeast of the stairs out of his gap to get past him to two light armors in a typical chest, but because you might mess up I wouldn't try this until you're comfortable with battle (and preferably not until you've got better weapons). Enemies vary by area and this area is tougher than the village.
To the west of the village is a swamp. In the north of the first swamp map is a chest that can be unlocked with a Typical Key, containing a Shuriken.
Another typical chest in the southeast of the first swamp map contains a Hawkfeather, an accessory that increases Perception, and three Mushrooms. You'll have to fight for this one, so it's worth waiting until you have some other gear together.
West of the first swamp map is more swamp, including a shopkeeper, the Swamp Witch. You can reach her with no fights with just a little running.
Give Telia the Shuriken, Spiked Buckler, Hawkfeather, and maybe Guiding Light, and she'll be doing pretty good damage. (I play Normal and snagged a Tribal Necklace as a fight drop, which I used instead of Guiding Light, and she could do 5 three times a turn to most enemies. Without the necklace three hits of 4 may be more likely.)
A Brave Champion Wanderer is probably best off for now with Midas, a Melee/Sleight mace found in the north cave basement.
A Tenacious Sage Wanderer is probably best off with Indiana, a Force/Sleight whip found in a house in the village southwest; getting a Wizard's Staff from the Swamp Witch is also an option. (I just mention this because I haven't really tried to use the Indiana.)
A Sniper Wanderer can fight Telia for the Shuriken plus relevant accessories, probably? The Swamp Witch sells a (Psychic) Crystal Orb that Telia is a little better with than the King's Throat. There's an outside chance that an enemy group will drop another Ranged weapon, but that's not worth grinding for.
With that weaponry and some of the armor above, you should be in pretty good shape against village or swamp groups. There are two more things you can consider doing before turning in for the night:
First, Telia can get two new skills right away. One's in the basement of the north cave, the other's in the swamp, one map north of the first swamp map (on a gray rock, it's a bit hard to see). You can get to both without fighting.
If you really feel confident, there's a boss group in the swamp cave (from the first swamp map, head north then west). You'll have to fight one normal swamp enemy group to get to the swamp cave. One enemy group in the northwest sort of blocks your way in the swamp cave; with some effort you can pull it to the entrance and use the obstacle to fake it out, not having to fight it, if you like.
The boss group is in the swamp cave northwest: Mister Odd and Reindeer. Save with a Portable Record and use some food before you attack. (Kill the Reindeer first, because it hits like a ton of bricks. At a haul of 5 coins each, neither is worth stealing from.) If you don't feel entirely confident, though, this can easily wait until you have another party member or two - you're just doing it to get some loot.
In any case, once you've stolen, explored, and fought enough, go back to the tavern for a well-deserved night's rest.
What now?
Talk to people. Talk to people you talked to the day before. Look around to see if anything's changed, particularly in areas you can reach without fighting. Learn what monster and character skills do (targeting something will show the current effects on it, in text). Follow up on any clues you find. Remember the ominous foreshadowy "two weeks" in the intro, but don't let that paralyze you either: you need to sleep for things to happen.
Visions & Voices: Day 1 Help
This is a supplement, not a replacement for either the "how to play" file or in-game help.
First Steps (If nothing else, read this!)
Choose a name and archetype (I wouldn't pick a custom class until you have a better idea of what you're doing, but if you must, it's a decent idea to max one stat) and proceed through the intro. Let Telia join you.
Do not get close to the glowy white balls - these are enemies, and you don't want to encounter them before saving. Go west a map then north a map (map transition points are hollow circles). You'll see a big building, the Ogre's Mug Tavern. Go in there. At the crystal upstairs, save but do not sleep.
Congratulations, you've saved! (An informal poll suggests that a significant number of players try to talk to a ball before reaching the tavern, without knowing it's an enemy or being ready to meet one.) Feel free to ignore the rest of this post and experiment... though some of what's below may take you a while to figure out.
There are stats. Characters do damage. Theoretically, shouldn't there be some connection?
You almost certainly noticed three stats quickly: Energy (En), Willpower (Wp), and Sheer Force (SF). Energy is HP and the other two are different types of MP.
If you did slightly more reading you should have learned of the other five public stats: Bravery, Perception, Charisma, Tenacity, and Logic.
Skills and weapons state which stats help them be more effective, but with codewords. Melee->Bravery, Ranged->Perception, Psychic->Charisma, Force->Tenacity, and Sleight->Logic. You can see that the shuriken described above is a Ranged/Sleight weapon, so its damage depends on the Perception and Logic stats.
The stats listed on a weapon will give you a pretty good idea of who in your party is best with any particular weapon, but that alone won't tell you how good the weapon is: you'll have to try it, or any other piece of equipment you want to evaluate, out. Complicating this, but a very useful thing to learn, is that some monsters are weaker against certain elements or against damage produced by certain stats or weapon types. When evaluating weapons, you may do best to check against a known baseline.
As a final warning, several characters join with weapons they're really not much good with. Don't take starting equipment as an indication of prowess, just check the stats.
Two kinds of MP? Tell me about skills.
Wanderer's skills are heavily tied into the difference between Willpower and Sheer Force. His ability set looks like this:
Necrotic Wish (Willpower cost): offensive spell, gives target weakness to elements.
Arcane Drain (Willpower cost): absorb Sheer Force from the target enemy.
Force Chain (passive): occasionally (in battle) a dark flash will show, and the entire battle party regains some Sheer Force.
When you hit Reverse Polarity, it changes to this:
Radiant Wish (Sheer Force cost): heal/buff; heals target, then increases target's max En. This is listed as Sleight, and my 100-logic Wanderer heals 35-55 En, depending on target max En.
Arcane Snatch (Sheer Force cost): absorb Willpower from the target enemy.
Power Chain (passive): occasionally (in battle) a light flash will show, and the entire battle party regains some Willpower.
Reversing polarity again will change it back to Necrotic. Polarity changing can be done any time outside of battle, and is fast in-battle, only taking ~1/3 the time of another action.
Flipping polarity is the key to getting anything done, especially early on. For my Brave Champion, Radiant Wish is an essential heal, but I need to switch to Necrotic so that I can get SF back, either through Force Chain or (less often) Arcane Drain.
And Force/Power Chain is significant. It doesn't occur regularly, and guarding forever won't make it keep happening, but in a middle-length to long battle you can expect to regain 4 SF or 6-8 Wp per character once or twice, and that makes an enormous difference in resource attrition. With polarity flipping between heal and MP regen, you can take on minor battles almost indefinitely.
Now for a brief look at Telia's combat skills:
Pilfering Jig attempts to steal from the target enemy, with a side effect: Telia is more likely to be targeted by all enemies. What can be stolen depends on the enemy type: some give a few coins, while some give more profitable items, but it's rare to get anything you'd want to keep or use instead of sell (at least on Easy/Normal difficulty - higher up you might want some of the consumables more). Some bosses likely have good or at least interesting steals? This also does a little damage even if the steal fails.
Ballad of Zephyr gives En regen (about 8 per turn) and makes its target less likely to be targeted by enemies. Since regen and degen trigger every time the unit with them acts, Zephyr is especially good for fast characters with lower max En, like Telia herself.
I've never really noticed any huge effect from Featherlight Song. Oh well.
Okay, that sounds fine in theory...
First you might as well explore where it's safe, right? Walk around the village, enter buildings and basements, talk to any people you can find, maybe see if you can leave. It never hurts to check a twinkle. Get into fights a couple times to see how they work, and reload or run back to the tavern to save when you think you ought. (Remember that monsters respawn once you leave a map.)
While exploring you will find boxes, which contain useful items - right now, generally food or a key or two. You'll also encounter locked doors and chests. Over the long run, I suggest mostly using Telia's Unlock feat in the place of Ornate Keys, as they are harder to come by and you'll appreciate having them later on.
Be careful, your limit for any item is 9, and you won't get any warning or chance to prevent overflow. (Especially relevant for keys, Energy Shots, and food. The food isn't so bad, and you can sell Energy Shots for a good price, but you might regret losing Ornate Keys.) On the other hand, unlocked boxes will seemingly sometimes disappear if they're not collected within a few days.
I won't list all the chest contents right now, but I will put in the early highlights:
The smithy in the village southeast has two typical chests: one with a heavy armor (and a next-to-useless King's Throat), one with a Spiked Buckler.
The farm south of the smithy has a barn. Upstairs in the barn is a typical chest with a couple useful accessories.
The large building (courthouse) in the village north has a typical chest upstairs, also with a couple useful accessories.
There's a path north from the village northwest that leads to a cave. You can sneak all the way to an ornate chest in the cave basement: unlock it to free a shopkeeper. If you're feeling adventurous, with careful running you can pull the enemy just northeast of the stairs out of his gap to get past him to two light armors in a typical chest, but because you might mess up I wouldn't try this until you're comfortable with battle (and preferably not until you've got better weapons). Enemies vary by area and this area is tougher than the village.
To the west of the village is a swamp. In the north of the first swamp map is a chest that can be unlocked with a Typical Key, containing a Shuriken.
Another typical chest in the southeast of the first swamp map contains a Hawkfeather, an accessory that increases Perception, and three Mushrooms. You'll have to fight for this one, so it's worth waiting until you have some other gear together.
West of the first swamp map is more swamp, including a shopkeeper, the Swamp Witch. You can reach her with no fights with just a little running.
Give Telia the Shuriken, Spiked Buckler, Hawkfeather, and maybe Guiding Light, and she'll be doing pretty good damage. (I play Normal and snagged a Tribal Necklace as a fight drop, which I used instead of Guiding Light, and she could do 5 three times a turn to most enemies. Without the necklace three hits of 4 may be more likely.)
A Brave Champion Wanderer is probably best off for now with Midas, a Melee/Sleight mace found in the north cave basement.
A Tenacious Sage Wanderer is probably best off with Indiana, a Force/Sleight whip found in a house in the village southwest; getting a Wizard's Staff from the Swamp Witch is also an option. (I just mention this because I haven't really tried to use the Indiana.)
A Sniper Wanderer can fight Telia for the Shuriken plus relevant accessories, probably? The Swamp Witch sells a (Psychic) Crystal Orb that Telia is a little better with than the King's Throat. There's an outside chance that an enemy group will drop another Ranged weapon, but that's not worth grinding for.
With that weaponry and some of the armor above, you should be in pretty good shape against village or swamp groups. There are two more things you can consider doing before turning in for the night:
First, Telia can get two new skills right away. One's in the basement of the north cave, the other's in the swamp, one map north of the first swamp map (on a gray rock, it's a bit hard to see). You can get to both without fighting.
If you really feel confident, there's a boss group in the swamp cave (from the first swamp map, head north then west). You'll have to fight one normal swamp enemy group to get to the swamp cave. One enemy group in the northwest sort of blocks your way in the swamp cave; with some effort you can pull it to the entrance and use the obstacle to fake it out, not having to fight it, if you like.
The boss group is in the swamp cave northwest: Mister Odd and Reindeer. Save with a Portable Record and use some food before you attack. (Kill the Reindeer first, because it hits like a ton of bricks. At a haul of 5 coins each, neither is worth stealing from.) If you don't feel entirely confident, though, this can easily wait until you have another party member or two - you're just doing it to get some loot.
In any case, once you've stolen, explored, and fought enough, go back to the tavern for a well-deserved night's rest.
What now?
Talk to people. Talk to people you talked to the day before. Look around to see if anything's changed, particularly in areas you can reach without fighting. Learn what monster and character skills do (targeting something will show the current effects on it, in text). Follow up on any clues you find. Remember the ominous foreshadowy "two weeks" in the intro, but don't let that paralyze you either: you need to sleep for things to happen.
 Philosophy of Treasure Distribution
I would warn people to be especially careful if considering scaling treasures.
The Chrono Trigger example works because it's repeatable: you can get every level of the reward. If you don't have some regulatory mechanism, a scaling treasure can easily generate perverse incentive, e.g., for players to not do the task because they don't really need the reward yet and don't want to miss out on the better, later version. If it's something important or unique and they didn't know ahead of time, they might even get irritated that they got locked into a sub-optimal version. (This was a problem with vanilla Oblivion, for example.)
The Chrono Trigger example works because it's repeatable: you can get every level of the reward. If you don't have some regulatory mechanism, a scaling treasure can easily generate perverse incentive, e.g., for players to not do the task because they don't really need the reward yet and don't want to miss out on the better, later version. If it's something important or unique and they didn't know ahead of time, they might even get irritated that they got locked into a sub-optimal version. (This was a problem with vanilla Oblivion, for example.)
Visions & Voices
author=yamata no orochi link=topic=4019.msg81594#msg81594 date=1245450858
This game is really hard!
I would say instead that battles take some learning. One of the things that works against the game is that the big difficulty hump is at the very beginning: you start out with crummy gear, an understrength team, and no idea how anything in the battle system works. Fixing the first two helps, but the last bit is the key: once you figure a few things out you'll be in much better shape than you probably imagine. But it can take some reloading.
Anyway, I'll wait until I've finished things off for a detailed report, but I'm enjoying the game. I'd certainly recommend people play it, but if you're wondering whether to play now or later, you might want to hold off a few days - there are still some fairly major bugs popping up.
Hero's Realm v1.5
Picked this up a few days ago, now that I finally have some time to play.
I was highly amused by this comment, because I've been doing an explore-everything run and breezed through this boss just like it was anything else. After all, with buffs, at this point you can have single characters doing 8000+ damage a turn.
Anyway, though easy it's been fun so far. 9 Tiny Medals to go!
author=halibabica link=topic=3289.msg78781#msg78781 date=1244294181
asdafdsadsadfsadsfasdafasadsfafd
KENTONA
I hate to sound like a whiny little nerd, but the Iron Gaia Virus boss is broken. Broken with a capital B! The only reason I was able to beat it was because I hit it with the instant death Tarot card, which dealt it OVER 50,000 DAMAGE*. I honestly don't see how it's possible to beat this boss any other way. It spams the hell out of moves that cause Surround, Stopspel, and utterly destroy your MP so it's not even there when you can use it. And all this MIGHT have been bearable if the damn thing didn't heal itself for roughly 7000 damage every 5 turns!
*Shouldn't bosses be immune to this?
tl;dr version: please nerf Iron Gaia Virus. He's really hard (in an annoying way). And does Max know you put those bosses in there?
EDIT: Wait a sec, that wasn't supposed to be the tougher-than-the-end-boss boss, was it?
So, anyway, some good news, I do think I'm getting near the end. And although it may not seem like it from my bug reports and difficulty complaints, I am really enjoying it! I might even have it finished by next week.
I was highly amused by this comment, because I've been doing an explore-everything run and breezed through this boss just like it was anything else. After all, with buffs, at this point you can have single characters doing 8000+ damage a turn.
Anyway, though easy it's been fun so far. 9 Tiny Medals to go!
 Instruction Manual
I am generally not a Z/X guy. They're fine for action games, but for more relaxed stuff I like to be able to stretch my hand a little.
kentona makes a good point about keeping things somewhere you can update, but I wish more manuals were like the Civilopedia: in-depth inline hypertext help.
kentona makes a good point about keeping things somewhere you can update, but I wish more manuals were like the Civilopedia: in-depth inline hypertext help.
Inspiration and Work Ethic
author=The Real Brickroad link=topic=3708.msg80069#msg80069 date=1244830387author=Max McGee link=topic=3708.msg79753#msg79753 date=1244748833
I am mostly upset because game quality cannot be positively correlated with game popularity to a point where making your games better will reliably make more people play them.
The man speaks TROOF. This has been an issue in RM communities, yea, even unto the Don Miguel days where we all made our games with sticks and fire and hunted wooly mammoths for sustenence.
Not just true for RM communities and games, of course. I read an article/paper on the phenomenon a while back that was interesting enough that I can still find it. (If Science scares you I suppose you can try a less dense commentary on the article.)
Funky Bugs
I have the same comment as Craze, but in regards to this:
Variables and switches work consistently in vanilla RM2K, or nobody would ever have been able to play Aurora Wing.
author=drgn_lord50 link=topic=3922.msg78760#msg78760 date=1244264858
RM2k's variables and switches did not function correctly so any events that used them got messed up. It happened to me a few times but doesn't seem to be major since you can fix it by restarting.
Variables and switches work consistently in vanilla RM2K, or nobody would ever have been able to play Aurora Wing.
Funky Bugs
I haven't had anything particularly amusing that I remember. But oh man, RM2K bugs. I was particularly annoyed once upon a time by a bug that popped up parsing cycles (the RM2K while loops). Instead of breaking out of the correct loop, it'd just continue down the code until it hit an "end cycle".
So this:
was an infinite loop.
There was the thing where MIDIs randomly played with a wrong/limited instrument set, too. Never really figured that one out.
So this:
CYCLE
>Break CYCLE
>CYCLE
>>...
>End CYCLE
End CYCLE
There was the thing where MIDIs randomly played with a wrong/limited instrument set, too. Never really figured that one out.
Item Carrying
I prefer to make inventory management as little work as possible, really. In RPGs I've rarely said, "That dungeon was great - now, even better, I get to go back and carry out the stuff I didn't have room for the first time!" or "Wow, my play experience was really improved by the fact that this game had an inventory limit."
As far as matching seamlessness with not being able to use 99 Megalixers in a boss fight (assuming you have some reason for giving the player that much stuff, which isn't really a given...) I think Seiken Densetsu 3 had a pretty good idea. Space in the local inventory is limited, and anything you loot that you don't have room locally for goes to storage. Storage has essentially unlimited room but your ability to get stuff out of it is constrained to certain situations (e.g., inns).
As far as matching seamlessness with not being able to use 99 Megalixers in a boss fight (assuming you have some reason for giving the player that much stuff, which isn't really a given...) I think Seiken Densetsu 3 had a pretty good idea. Space in the local inventory is limited, and anything you loot that you don't have room locally for goes to storage. Storage has essentially unlimited room but your ability to get stuff out of it is constrained to certain situations (e.g., inns).
The RPG difficulty problem
author=Lennon link=topic=3843.msg76773#msg76773 date=1243285117
Okay so excuse my idiocy, but I have almost no idea what you are saying here. Are you saying that grinding removes the need for skill, or?
Well, it seems it wasn't you, I wasn't clear enough in the OP to get across what I was aiming for. So let me neglect individual responses this post in order to try again.
Read it like this. Any game has to deal with players of a wide range of skill, so any game has the problem: how do I provide a skill-appropriate challenge to Joe Slow, Joe Average, and Joe Whizkid, plus every player in between? (Of course, there's a lot that can go into 'skill' here: familiarity with the game itself, with the genre, abstract reasoning, sometimes twitch...)
We can probably assume there's some flexibility to deal with this in the battle system alone (e.g., slightly less skilled people than the target use a little more MP, so they have waste time running to an inn occasionally), but that to provide optimum challenge to any given player we have a fairly narrow target range of difficulty.
So. RPGs tend to have lots of mechanisms for making sure an unskilled player can make the game easy enough. But many of these mechanisms are also attractive to more skilled players, for the reasons in the OP among others. How can we keep things challenging for everybody?
So for example, one thing I thought of some years ago is to track the resource expenditure of the party for each battle. Then when the player encounters an enemy group, if he's met that group before, give him the option of just spending what he spent the last time he fought them. (Ideally without interrupting the flow of play much.) That way if he's satisfied enough with how the battle went to not want to do it over again, you're not forcing him to waste time on a boring fight.

