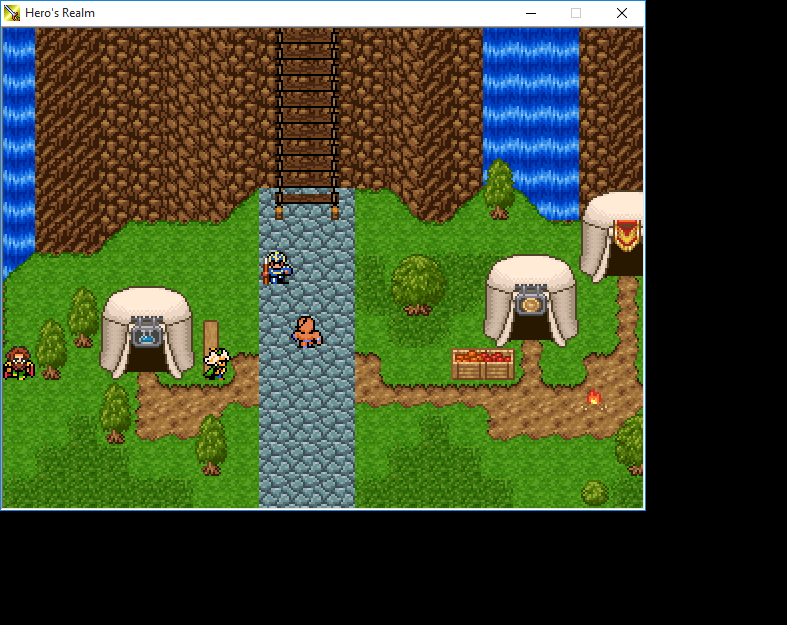
HOW TO TAKE A SCREENSHOT AND SUBMIT IT TO THE SITE
Part of a HOW-TO guide to using RMN's services
 kentona
- 11/04/2010 10:19 PM
- 24122 views

How to take a Screenshot and submit it to the site
by kentona
You will need:
- Your project
- Paint (a.k.a. MSPaint)

Part I - Taking the Screenshot
This is Windows 101 guys (maybe 102). Everybody ought to know how to take and save a screenshot - it's a useful and simple skill that has a myriad of uses.
1. Run your project
- I prefer to do it in Full Screen mode. That way, you don't have to crop the image to get rid of the Windows header and border
2. Press Alt + Print Screen
- This saves a picture of the visible and active window to the Windows Clipboard
3. Exit or minimize your project
4. Open Paint
- Start > All Programs > Accessories > Paint
5. Resize the Image Attributes to at least a size that you can see details easily. Less than 1080p would be best due to most monitor sizes and site stretching issues.
6. Press Ctrl + V (or Edit > Paste)
- Even if your image dimensions are too small, Paint automatically expands the width and height to at least the size of the picture in the Clipboard
7. Goto File > Save
- The common Save dialog box opens, typically defaulting to the My Pictures directory
8. Set 'Save as type:' to 'PNG (*.PNG)'
10. Click 'Save'

Part II - Submitting the Screenshot
As a prerequisite, you must have already submitted the game to the site.
NOTE: The game does not have to be 'Accepted' yet!
You are free to add or edit your submission at any time, even before the admins approve the game. In fact, the admins won't approve the game until it has 3 screenshots. For more submission rules, please see: Game and Review Submission Rules
1. Log in to RMN
2. Go to Account > Manage Games and find your game
- If you can't find your game, or your game hasn't been accepted yet, check the Submissions page for your game submission.
3. Select the game you wish to update
4. Go to the Images tab
5. Scroll to the bottom of the page and click the 'Add Image' button
6. Click Choose and find your awesome screenshot (probably in My Pictures) and select it
7. Click 'Submit' button
8. You should see a message like:
"Your game image has been added successfully!"
9. Edit the image to enter the Title of the image (ie- The Direstone Castle of Doom).
Voila! You've just created and submitted a screenshot! Now it's in the Admins' court (and you know those guys are lazy jerks).
Posts 

Pages:
1
This is actually different to how I do it, as I don't like the window showing in the shot, so I hit Print Screen, zoom in in Paint a bit, paste it and then move the edge of the actual picture right to the edge of the Paint window, then change the image to 640x480. But if you don't mind the window, your way is quicker.
author=EriksBlueIN your case, since the game isnt accepted yet, click on Submissions in the top, click the Edit button next to your game submission, and then click on the Images tab on the top and then click the Add Image button.
I cant see where i need to upload the image
http://rpgmaker.net/forums/topics/8095/?post=383340#post383340
Try posting your screenshots here and asking for advice.
Try posting your screenshots here and asking for advice.
LockeZ

I'd really like to get rid of LockeZ. His play style is way too unpredictable. He's always like this too. If he ran a country, he'd just kill and imprison people at random until crime stopped.
5958
This walkthrough says to make sure your screenshot is no larger than 320x240, and is linked to from the submission rules, which is apparently a little confusing and makes people think that's a rule. Also that's terrible advice for anyone using an engine later than RM2K3, since all later makers use higher resoluitions. Can you reword it plz?
Even if your image dimensions are too small, Paint automatically expands the width and height to at least the size of the picture in the Clipboard
author=kentona
Even if your image dimensions are too small, Paint automatically expands the width and height to at least the size of the picture in the Clipboard
I don't follow. What exactly is the point of resizing the image to 320x240 then?
author=Link_2112author=kentonaI don't follow. What exactly is the point of resizing the image to 320x240 then?
Even if your image dimensions are too small, Paint automatically expands the width and height to at least the size of the picture in the Clipboard
To prevent stuff like this:

True, although an easier way to fix that would be to paste the clipboard then click the Crop button. 1 step. Rather than the 3-4 steps to change the image size.
LockeZ

I'd really like to get rid of LockeZ. His play style is way too unpredictable. He's always like this too. If he ran a country, he'd just kill and imprison people at random until crime stopped.
5958
Yes, Grandpa.
Instructions for Windows 7 and up:
5. Press Ctrl + V (or choose Paste from the Home tab)
6. In the Home tab, use the Select tool to select the part of the image that is actually your game. Then click the Crop button.
Instructions for Windows 7 and up:
5. Press Ctrl + V (or choose Paste from the Home tab)
6. In the Home tab, use the Select tool to select the part of the image that is actually your game. Then click the Crop button.
Not only is it easier, but you don't really explain how to change the size of the image. It's not exactly obvious and if someone needs this kind of tutorial you're probably going to want to hold their hand to the max.
Taking the Screenshot
in Linux (Ubuntu, Lubuntu, ...)
1. Run your project
2. Press Alt + Print Screen
3. Go to your Home Folder: You'll find your screenshot as PNG file. The file name starts with the date in the format yyyy-mm-dd-hhmmss.
in EasyRPG
1. Run your RM2k or 2k3 project in EasyRPG
2. Press F10
3. Go to your project folder: You'll find your screenshot as PNG file. The file name starts with "screenshot_" followed by a number that increase every time you take a screenshot.
Both methods instantly create a new screenshot file every time you press the key(s). This is very handy when you test a game and take a screenshot every time you want to report an issue to the developer.
Pages:
1


