• Add Review
  • Subscribe
  • Nominate
  • Submit Media
  • RSS
There is now a website you can use to share your custom content with other users! But you're still welcome to use this page to share and discuss content.

Below is a list of finished custom (user-made) content. To add these characters, in most cases you can extract the downloaded file to the game's main directory and you're set. Depending on how the author has organized them, it may be necessary to move files to the appropriate directories. (Custom content has not been tested by me)
Note: After new content has been added, old saves won't be compatible.

<-------------------------------------------------------------->

Yuu Lambaria
Author: KimotoDragoon
Content types included: story, profile, tachie, music
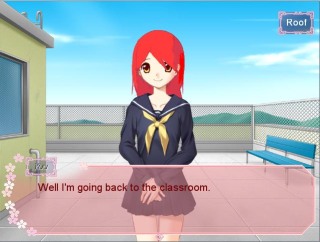


Joruri
Author: Marrend
Referring post: here
Content types included: story, profile, tachie, music
(Requires Masako, Junko, and Clean Mode off)
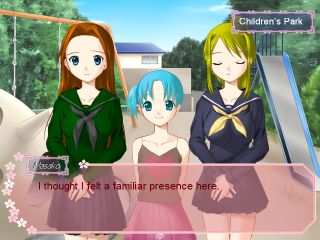


Emiko
Author: Marrend
Referring post: here
Content types included: story, profile, tachie, music


Junko
Author: Nekochi
Referring post: here
Content types included: story, profile, tachie, music
(For this content, it is recommended playing with Clean Mode off, if you have unlocked it)


Uchioniko (4 characters)
Author: Marrend
Referring post: here
Content types included: story, profile, tachie, music
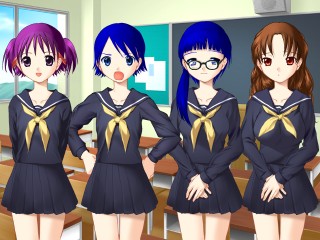


21 Ways
Author: dude797
Referring post: here
Content types included: story, profile, tachie, music
(For this content, it is recommended playing with Clean Mode off, if you have unlocked it)
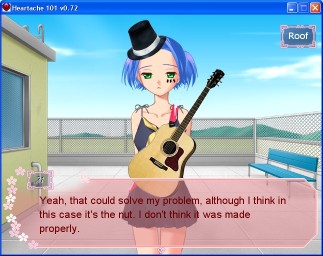


Masako
Author: Marrend
Referring post: First post on the page!
Content types included: story, profile, tachie, music
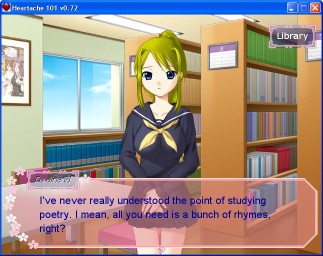


<-------------------------------------------------------------->

If you have posted custom content in this thread, I will (eventually) add your link to the list above, along with a small screenshot if you have included one. Be sure to test your content in-game before posting.


Helpful things:

--> Medium build girl, the .psd that was used to create the built-in characters, is available with layer names in English.

--> Not feeling artistic? You can use any of these images for making custom characters.

--> Notepad++ with syntax highlighting for Heartache 101 can be a big help with story creation.

--> If you are writing story content that includes the appearance of existing characters (built-in or custom), the following list may be of reference:
ID 0 = The Player
ID 1 = Nakajima Miki
ID 2 = Ikeda Keika
ID 3 = Onishi Tsubasa
ID 4 = Kaneshiro Shihoko
ID 5 = Kaneshiro Riho
ID 6 = Sato Akari
ID 7 = Hiraoka Hinami
ID 8 = (Secret character)
ID 9 = Watanabe Junko
ID 10 = Mitsuya Masako
ID 11 = Monotami Ruri
ID 12 = Nemoto Mayu
ID 13 = Terakado Shoko
ID 14 = Shirazu Izumi
ID 15 = Watanabe Aoi, Lambaria Yuu
ID 16 = Ran Fujioka
ID 17 = Torako Koizumi
ID 18 = Yumemi Tanno
ID 19 = Umehara Joruri
ID 21 = 21 Ways
ID 22 = Kirinashi Kyouki
ID 23 = Reserved for Nekochi
ID 24 = Reserved for Nekochi
ID 25 = Kuwabara Emiko
ID 26 = Reserved for triad2
ID 27 = Katanashi Seira
...
ID 30 = Vacant
ID 31 = Maeda Eriko
ID 32 = ? Genji
ID 33 = Vacant
...
ID 39 = Vacant
ID 40 = Konohana Midori
ID 41 = Natsume Rika
ID 42 = Vacant
ID 43 = Vacant
ID 44 = Hasegawa Kanon
ID 45 = Vacant
...

(Note: You don't need to care about this list if your story events will not include existing characters, as ID numbers for characters in separate files don't have to be unique)

--> Finally, I've listed the game cheats here. You can use these during story events to test your content:
SHIFT + F5 -- Adds 10 to Looks
SHIFT + F6 -- Adds 10 to Athletics
SHIFT + F7 -- Adds 10 to Personality
SHIFT + F8 -- Adds 10 to Mind
SHIFT + F9 -- Adds 10 to Soul
ALT + F5 -- Adds 1000 to yen
ALT + F6 -- Active speaker's affection decreases by 100
ALT + F7 -- Active speaker's affection increases by 100
ALT + F8 -- Advances the calendar by 1 day
ALT + F9 -- Advances the calendar by 7 days


Posts

Marrend
Guardian of the Description Thread
21806
I think if I do another custom character, it will be an adult. Meaning someone with ENCOUNTERS = OFF, has a steady job, and all that good stuff. I've still got two failed/abandoned game ideas, so I can draw initial inspiration for the character's personality without too many problems. Getting graphics might be an issue, though.


*Edit: @Nekochi: I don't think I properly communicated what I was trying to say before. Allow me to try again:
I expected Aoi's graphics to be OTHER slots for Junko, not her own unique (though non-datable) character. I hope this clears up what I meant about the sequence with Miki. It would look pretty crazy, don't you think?
I can do minor editing of the clothing for the Tachie. I'm sure you saw what I did with Junko's track uniform, as well as Aoi's clothes. If you would like, I could attempt to do something similar to create other clothes.

Edit:
Okay. That makes sense. And yes, that would pretty crazy.
Marrend
Guardian of the Description Thread
21806
Well, it all boils down to who I want to make. I've got options, and I'm interested in seeing how other people "see" these characters before I make my own attempt. Time to see how good my description skills are:


Ikuba Toshie: This young woman is from Nakaishi Wars, a sci-fi setting. I imagine her with a green braided ponytail with blue eyes. She'd wear some kind of uniform that indicates that she is a member of space-faring organization, not unlike Star Fleet of Star Trek fame.

Kuwabara Emiko: The title character of Oracle of Askigaga, a fantasy setting. She wears robes with a royal purple hue to indicate her importance in society. She has long blue hair with braids on either side of her face, and blue eyes.
@ Marrend
Tell me what you think.


Obviously this takes the whole Star Fleet thing a bit too far, using the exact same logo and all that, but this would just be a sample. The hair for the other girl wouldn't be too hard, but the robes would take some work. So I'm just showing you this for now, as she is certainly the easier of the two to create.
Marrend
Guardian of the Description Thread
21806
Wasn't expecting sleeveless, but that's pretty cool nonetheless! How do you do that?
Here's how I did it. I'm putting it behind hide tags, not so much because it contains spoilers, but because the explanation is just so danged long.
Okay, I have Photoshop, which makes some of this easier, but I think the techniques can probably be transferred over to Gimp pretty easily. If this isn't the case, I apologize, as I don't have much experience using Gimp.

I started by finding one of the layers that had the base of the shirt (the chest portion with the tie, sans the sleeves and the the collar.) You can pick whichever *ahem* chest variety you wish. I've used this technique with the smallest one for Aoi and the medium one, for Junko. I've never used it on the largest chest size because I think it looks a bit silly, but it could easily be used with it. Then I duplicated the layer that it was on, as I'd be doing some editing and didn't want to ruin the layer for further use later. I then used the brush tool on this new layer to cover up the tie, using the eyedropper to try my best to match the colors as they appear elsewhere. You can either choose to lock the transparent pixels, so you don't "color outside the lines", which is what I did with Aoi, or you can just wing it, which is what I did with Junko's track uniform shirt. As you can see, it looks pretty messy so far. Don't worry too much about that. It will look better pretty soon.

The next step is to blur the colors together, so that the shirt looks a little more natural and less patchy. There are several ways to do this. I'm not sure that Gimp has the same tools that Photoshop has, so I'll try and cover a couple of methods. You could, of course, use the blur tool. This works well enough, though there are several drawbacks to it. One is that as you blur along the edges, it actually makes the edges less precise and you loose pixels. Therefore, you can't do it with the transparent pixels locked, or the places where you loose pixels will turn black and rather ugly. In any case, I would recommend duplicating the layer again before trying to blur it, as if you loose pixels, having the other layer visible underneath the one with lost pixels will give the impression that the shirt has retained it's shape. Plus, it allows for any little hiccups that might come up.

I will now bring up my second and preferred method of blurring the colors together. This technique works much better, but I wasn't sure Gimp had it, whereas I would be very surprised if it didn't have a blur tool. I'm pretty sure that Gimp at least has filters, I'm just not sure if it has my favorite blur filter, so this method can still probably be of some help. You start by finding the filters, which in Photoshop have their own menu, and finding the different options to blur. Some of these options are better than others, but they should all work, given enough fiddling. My favorite is called surface blur and only blurs the surface of the object, so that the layer keeps it's shape. It also allows you to mess with the settings before you blur them, so you can get them looking the way you want them to. I know menus like those can be a little confusing at first, so just mess with them a little until you think it looks good. Just be sure not to blur it either too little or too much. You want it to look similar to shading on the rest of the tachie.

You can see below how it looks after I used the surface blur. Looks a lot better, doesn't it? However, I still wasn't satisfied with it, so I undid the blur and messed around with the colors a bit more, to see if I couldn't get it to look better. I was much happier with this result. Now it was time to change the color of the shirt. I did this by going to Image -> Image Adjustments -> Hue/Saturation (or Ctrl + U). I'm sure Gimp has a similar tool, but I'm not sure where it can be found, so I'm just telling you where to find it in Photoshop. In any case, the menu for this tool has three different settings, hue, saturation, and lightness, which can be adjusted via a slider or by entering values. I just fiddle with the sliders until I come up with something I like, and then I make sure to write down the values I used, so I can replicate the same color later, should I decide I want to add sleeves or something. If you can't get the color you want, there is a box you can click that says colorize, which allows you to get any color you want, but it colors everything the same shades, so that if you have more than one color there (say you still had the yellow tie in some capacity) and you wanted to color it pink, it would all become pink, whereas if you don't use the colorize option, the different color would change colors, but still wouldn't be the same color as the shirt itself. In any case, I chose a nice red for the shirt.

Now, I'm sure you can see that the outline of the shirt is still quite messy. Using the polygonal lasso to select parts of the shirt and then delete them, I created a nicer looking neck line. Then I use the same tool to select a neckline with a turtleneck and use the eyedropper and the brush tool to color it in. It's starting to look very nice, isn't it?

I now add a layer style called a stroke, which creates a border around the shirt. I choose a color I like and set the thickness of the stroke to 1. Unfortunately, this makes things look a little messy again, so I use the eraser and polygonal lasso tool to clean up the edges a little more so the border will look better. Then I'm done with the shirt, except for the badge, which I add by creating a shape with the polygonal lasso, which I fill with a gray color and then adding layer styles to put a 1 pixel gray stroke around the border and add a bevel to give it a 3D look.

I create the pants by duplicating the layer that makes up the tachie's skin and then changing the color using the Hue/Saturation image adjustment that I used earlier. This makes all of her skin look black, so I use the lasso tool again to delete the layer above her waist, so that only her legs look black. Then I find the layer the has the outline of the body and repeat the same process.

As for the hair, I merely changed the color of the braid using the same methods as above and moved the layer so that it was behind the layer with the skin, so the braid would appear behind her body. I used similar methods with the bangs, eyes, and eyebrows.


You can also try the spot brush healing tool to remove the tie. After a few strokes that tie is gone without having to use the color picker tool or clone stamping the area. Usually makes the area look smoother too.

Although your idea to just recolor the existing blouse and reshape from there is quite good.
Very nice, Nekochi. You seem to know what you're doing there.

@Marrend
author=Marrend
Not exactly intentional. Interestingly enough, I barely caught a glimpse of the front of the school before I jumped to wherever. Outside of that brief oddity, if you look at Ruri's code, that's exactly how it should work, given what I know of the system.

Hmm, in my version at least the place isn't set to Front B, meaning that you could be in the middle of the school day when this event springs up and suddenly you're in the city. Which I suppose is not game-breaking but....

About the use of punctuation in parenthetical sentences: In games, sentences in parenthesis are generally considered "thinking" lines. The character is not speaking, but a complete thought is ended by some manner of punctuation. Didn't your English teacher tell you this!? Even if it's a thought that trails off, there should be an ellipsis ("...") to indicate the action of trailing off in thought.

Fudge. Looks like I'll be spending the next hour or so going through all the built-in stories to fix the punctuation! (At least I know I'm right about one thing--that sentences that trail off have four periods; one to end the sentence and the other three for the ellipsis)

*Edit: As a total side-note and wanting to squeeze as much information into this post as inhumanly possible, I've yet to meet this NPC informant. I'm guessing I haven't played enough of the game, or the locations where he/she shows up is not where I normally frequent (stat-buff locations and the Internet Cafe).

You're right, the informant (like most other random NPCs) don't show up at stat-buff locations or the Internet Cafe. Also, the informant doesn't start showing up until later in the calendar.
Marrend
Guardian of the Description Thread
21806
author=flowertheif
Hmm, in my version at least the place isn't set to Front B, meaning that you could be in the middle of the school day when this event springs up and suddenly you're in the city. Which I suppose is not game-breaking but....

See, the initial event that leads to the various JUMP commands has no PLACE line in it. At least in the version of the story file I have. Thus, what would normally be an afternoon event can be obtained during school phase. Why Front A (or Front B) was displayed for that brief moment is beyond me, as I've assumed the default PLACE is "None". If I recall, there's another event with no initial location, but it JUMPs into PLACEs that are attributable to school phase. Thus, it might not be as noticeable.


*Edit: The fact that I could have had a CONTINUE line with Ruri's city phase events if I really wanted to is probably the kind of potential game-breaking you're thinking of. "Landed on a girl, blah-blah-blah. Wait, I'm in the Library with Masako? They're going to let me get my MIND up too!? Now I'm at the Shrine? SOUL up!? Dude, I'm only a quarter of the way through the board!"
I think what Flowerthief meant was that it was weird that you could get the event in the middle of school and head out to the city and then you're back to the board and can continue your school day as if nothing ever happened and you never left school. Personally, that's the kind of thing that would bug me, but I'm a bit nitpicky at times.
Marrend
Guardian of the Description Thread
21806
I can't remember off-hand, but it seems to me that Tsubasa has (or should have) a few events that have the players JUMP from a school event to a city event. You're "skipping class" with her to help along with her investigations, so there is something of a story reason there. This is not so much true with Ruri's JUMPs into city events, but there you have it.


I do have to wonder if it's possible to do a CONTIUNE at stat-buff location, then do a JUMP to another stat-buff location. Might try testing that.
Marrend
Guardian of the Description Thread
21806
I've decided to work on Emiko, and have a totally different graphical style than the "medium build girl" that's all over the place in this game. I've no screenshots at the ready, and frankly have no clue how well it will match up with anything.

There's also the fact that one of Emiko's hands in her "angry" pose looks quite flat to me. Like it was done in MSPaint. I'm not up to going through the motions of fixing it, as it took quite a bit to get that pose/expression in the first place.
Marrend
Guardian of the Description Thread
21806
Uchioniko updated!

What's changed:
Various spelling/grammar errors that have been pointed out have been fixed. There might still be weirdness with one of Ruri's events (namely the one that goes into a "city story"), but I didn't see any other issues during the playtesting that I performed.

What still needs to be done:
Unless more errors are found, Uchioniko should be good to go.

Where to get it:
There's a couple ways to get Uchioniko. The most obvious is to observe the various links at the top of this page. Another is to click here. I will, momentarily, make an attempt to upload Uchioniko onto the other custom content page. Should I succeed, I will edit this comment with an appropriate link.
^ A teeny tiny thing:
Story 10, Branch B in Ruri's file. Should be
"True, she wasn't too thrilled about getting it."

That was actually about as far as I got last time, since the way I built my stats closed me off to all four of their storylines. I'll have to play differently next time.
Marrend
Guardian of the Description Thread
21806
About the typo: D'oh!
About that other thing you mentioned:
You should not have been locked out of Ruri's stories if you were locked out of the others. In fact, assuming I had the correct references, getting locked out of the other girls stories is what unlocks Ruri's sequences. I may have to look at my code again to see if that's what's actually happening before making another update.


*Edit: Of the attempts at uploading Uchioniko onto the other site, all of them have come up with some kind of failure. The first couple of times, an error ("The server has timed out!") was displayed. I noted that I was doing other on-line stuff. On the assumption that the other stuff I was doing was somehow interfering with the upload, I made three (or so) more attempts where I was not doing anything on my computer, save listening to music and uploading Uchioniko. I didn't get an error, but, after about a minute or so, the downloading window closed itself without any indication that anything happened. As far as I can tell, the ZIP file did not upload. I successfully uploaded "uchioniko_heartache.png", so I'm on the assumption that there's a random fluke going on. It could also be that Uchioniko is terribly close to being at the 10MB maximum for the site.
I think the other attempts may also have been timeouts even though you didn't always see an error. Iirc the max execution time my host has set is 30 seconds. For a case like this I think all we can do is have me be the one to upload it through the back end. Let me know whenever you'd like me to do that.
Marrend
Guardian of the Description Thread
21806
I've looked at Uchioniko again, and made another update. There might still be a few spelling/grammatical errors, but I don't quite see how all four characters could be "locked out" simultaneously. It could simply be that whatever system is in place to decide what event comes up did not "roll" a Ruri story event, or whatever.

In any event, flowerthief, if you want to attempt to upload Uchioniko onto the other site, you have my permission. Though, if I were writing the note, it would either be an attempt at a crummy tag-line ("Four characters. One download. No sanity."), or something more friendly, but along the same lines ("Four characters in one easy download!").
Allrighty, it's up.

Nekochi, if you're around, have you tried to upload Junko to the website, or shall I do so?
I'm trying to upload it, but it's
author=flowerthief
Allrighty, it's up.

Nekochi, if you're around, have you tried to upload Junko to the website, or shall I do so?

I tried to upload it, but when I did I got this error:

"That is not a valid file type (application/octet-stream) or file size too big!


Allowed file types: application/zip;application/x-zip;application/x-zip-compressed;application/x-rar-compressed
Max. file size: 10 MB"

5,475 KB is less than 10 MB, right?

In any case, I wasn't able to upload it, so go ahead. It might be helpful if someone could also make a .zip version of the file since I can't.
Oh man everyone is having problems uploading. This one looks like another file type issue. The file type issues can be solved by allowing uploads of any file type, but if I do that then I have to implement user accounts or else anyone could upload nasty files. User accounts isn't hard to do. The problem is maintenance. For forever I would have spammers trying to register spam accounts, not to mention people forgetting their passwords, and everything that goes with running a site that has user accounts. Why is there never a headache-free solution :(